How to Plan Concrete for Multi Zone DIY Projects
The core approach: Divide large projects into zones of 10–15 cubic feet each (20–35 bags per session). Calculate materials per zone separately. Pour one zone, let it cure 24–48 hours, then use the cured edge as a form for the next zone. Use expansion joints between zones.
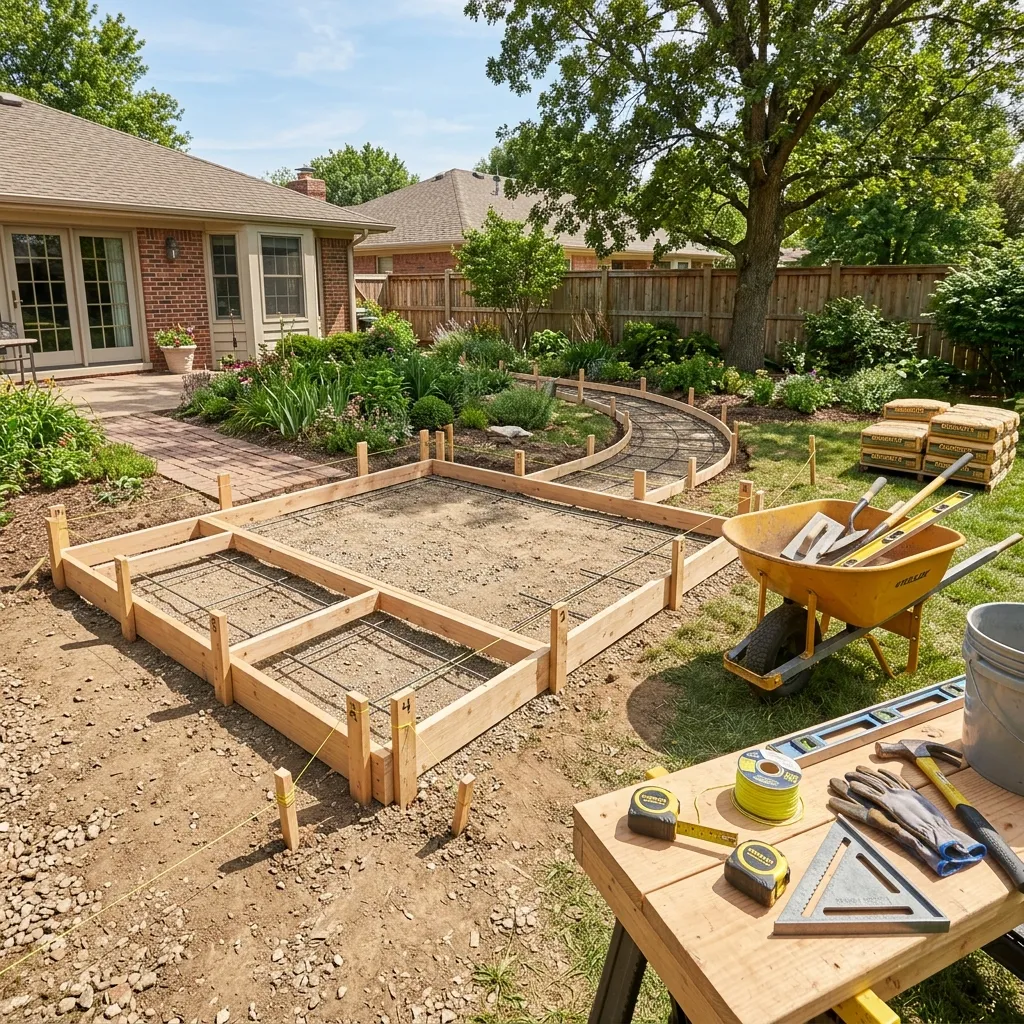
If you are tackling a large backyard renovation, a long walkway with steps, or a sprawling patio with distinct sections, knowing how to plan concrete for multi zone DIY projects is the key to success. A single, massive concrete pour can easily overwhelm even an experienced DIYer. By breaking your project into manageable zones, you reduce stress, maintain better control over the finish, and avoid costly mistakes.
In this comprehensive guide, you will learn exactly how to divide your concrete project into logical zones, calculate your materials accurately, prepare your forms, and execute the pours step-by-step without losing your mind—or your money.
Why You Should Pour in Zones
When working with concrete, time is your biggest enemy. Once the water hits the cement mix, the chemical reaction (hydration) begins immediately. If you try to mix, pour, screed, and finish 100 cubic feet of concrete all at once as a solo DIYer, the concrete will set up before you have time to finish it properly.
Breaking your project into multiple zones allows you to:
- Work at your own pace: Pour one section on Saturday and the next on Sunday.
- Achieve a better finish: You have ample time to trowel, broom, and edge before the concrete hardens.
- Manage materials easier: Mixing 20 bags at a time is far less exhausting than mixing 80 bags in a single afternoon.
- Incorporate control joints naturally: The seams between your zones can act as expansion or control joints to prevent random cracking.
Step 1: Map Out Your Project Zones
The first step in learning how to plan concrete for multi zone DIY projects is grabbing a piece of paper and sketching your layout.
Define Logical Breaks
Look for natural transition points in your design. If you are building a patio that connects to a walkway, the junction between the patio and walkway is a perfect place to divide a zone. If you are pouring a very long 30-foot sidewalk, break it into three 10-foot sections.
Consider Your Workforce
Are you working alone, or do you have three friends helping you? A solo DIYer using a portable electric mixer might only be able to comfortably pour and finish 10 to 15 cubic feet (about 25-35 60lb bags) in a single session. Size your zones based on what you and your crew can realistically handle within a two-hour window.
Step 2: Calculate Concrete for Each Zone
Once your zones are drawn and measured, you need to calculate the exact volume of concrete required for each individual section. Never estimate the entire project as one lump sum if you are pouring on different days—you need to know exactly how many bags or yards to buy per pour.
Measure Length, Width, and Depth
For each zone, measure the length and width in feet, and the depth (thickness) in inches. Most standard sidewalks and patios are 4 inches thick.
Pro Tip: Always factor in an extra 10% to 15% for waste and uneven subgrade. Running out of concrete when you are 95% done with a zone is a DIY nightmare!
Use our free Concrete Bag Calculator to quickly punch in the dimensions for Zone 1, Zone 2, and so on. Save or write down the bag count for each section.
Step 3: Forming and Preparation
Proper forming is critical when connecting multiple concrete slabs.
Setting the Perimeter Forms
Stake and level the perimeter forms for your entire project first. This ensures the overall slope and shape are correct. Use 2x4 lumber for a standard 4-inch slab. Make sure your forms slope slightly away from your home’s foundation (about 1/4 inch per foot) for proper water drainage.
Adding Divider Boards (Bulkheads)
Once the perimeter is set, install temporary divider boards (often called bulkheads) to separate your zones. These dividers will hold the concrete in place for your first pour. Make sure they are perfectly level with the perimeter forms, as you will be using them as a guide to screed (level) the wet concrete.
Stake these dividers firmly on the side opposite of where you are pouring first, so the stakes don’t get buried in the new concrete.
Step 4: The Pouring Strategy
With your zones defined, calculated, and formed, it is time to pour. A common strategy for a three-zone project (like a walkway, landing, and patio) is the “checkerboard” or sequential method.
The Sequential Pour
Start at the lowest elevation or the furthest point from your concrete source (or mixer) so you aren’t walking over finished concrete.
- Pour Zone 1 up to the divider board.
- Screed, float, edge, and finish Zone 1.
- Allow Zone 1 to cure for at least 24 to 48 hours.
- Carefully remove the temporary divider board. The solid edge of Zone 1 now becomes the form for Zone 2.
- Pour Zone 2 directly against the edge of Zone 1, and repeat the process.
Step 5: Managing Joints Between Zones
When you pour fresh concrete against hardened concrete, they do not bond perfectly together. This creates a “cold joint.” While cold joints are structurally sound for ground-level patios and walkways, they can move independently during freeze-thaw cycles.
Using Expansion Joints
To prevent the slabs from pushing against each other and cracking, insert a piece of asphalt-impregnated expansion joint material (typically 1/2 inch thick) against the hardened edge of Zone 1 before pouring Zone 2.
Doweling for Stability
If you want to ensure the two zones stay perfectly flush and do not settle unevenly over time, you can use steel rebar dowels. Drill holes into the edge of the hardened Zone 1 slab, insert short pieces of rebar (dowels), and pour Zone 2 around them. This “locks” the slabs together vertically while still allowing slight horizontal expansion.
Conclusion
Learning how to plan concrete for multi zone DIY projects takes a little extra mental effort upfront, but it pays massive dividends in the quality of your finished project. By breaking the work into manageable pieces, estimating materials per zone, and using proper jointing techniques, you can achieve professional-level results without burning yourself out.
Ready to start planning your zones? Head over to our Concrete Bag Calculator to figure out exactly how many bags you’ll need for each section of your next big backyard build!
Frequently Asked Questions
- Can I pour a new concrete slab directly against an old one?
- Yes, but they will not bond seamlessly, creating a cold joint. It is highly recommended to place an expansion joint board between the two slabs to allow for seasonal expansion and contraction, preventing cracks.
- How much concrete can one person comfortably mix and pour in a day?
- Using a portable electric cement mixer, a solo DIYer can typically handle 20 to 35 bags (60lb or 80lb) in a single session. This yields roughly 10 to 15 cubic feet of concrete. Trying to do more than this alone risks the concrete setting up before it can be properly finished.
- Should I use rebar or wire mesh when pouring in zones?
- For standard 4-inch patios and walkways, wire mesh or fiberglass fibers added to the mix are usually sufficient for crack control. However, adding steel rebar dowels between your separated zones is a great way to prevent the individual slabs from shifting unevenly over time.
- How long should I wait before removing the divider board between zones?
- You should wait at least 24 to 48 hours before carefully removing the temporary wooden bulkheads. The concrete needs enough time to cure so that the edge doesn't chip or crumble when you pry the wood away.